When setting up a professional or home studio, connecting the monitors is always a drill that is challenging when you don’t know much technical stuff. If you are one of those looking for ways to set up studio monitors, read the article to get detailed insights about the methods.
This guide will cover all aspects to maximize the sound performance of your personal space with a proper setup. You can quickly improve your studio with these helpful steps and learn how to set up studio monitors. So let’s start with it!
Why is Studio Monitor Setup Important?
Setting up a studio monitor is essential because they work for what you perceive and how well you learn it. Whether you are a musician or trying to record something at home doesn’t matter. A well-settled studio monitor donates to how you perform.
It is one of the vital features of recording music. Ensure you have the best out of your monitors for excellent response. You can notice every detail and timing in your take while recording the performance through the monitor setup and can take action to solve them. When you start mixing, you can see the complete picture of the track.
With this monitor setup, you can easily edit, time corrections, and fine processing to get good results. So make sure that all your speakers are in the correct positions, and the right set is the key to the success of anything you want to get from your monitor studio.
How To Set Up Studio Speakers?
Setting up studio speakers at the same height as your ears is good. Make sure that they will not move up or down from the position of the ears. Please keep them in an equilateral triangle so they will remain at the same distance.
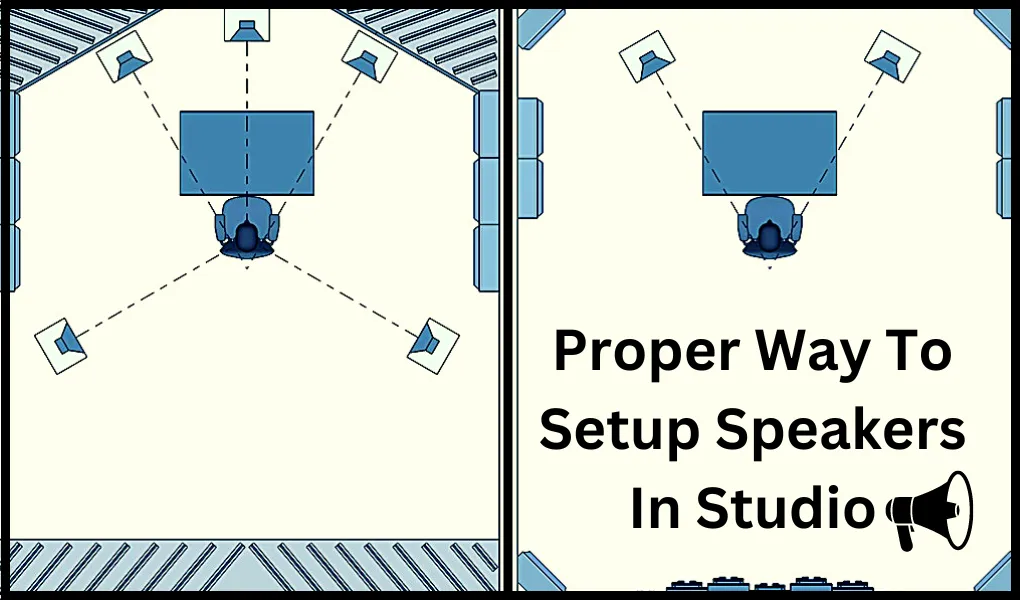
Remember these points when setting up studio speakers. You can also take help from the studio monitor setup diagram.
- Position your speakers correctly.
- Find a sound source for calibrating your speakers.
- Set up your pink noise in your DAW.
- Calibrate speakers individually.
- Mark your settings.
- Calibrating your Subwoofer.
- Finalizing the settings.
Although these important considerations are helpful, the setup procedure changes slightly depending on the purpose for which you are connecting the studio monitor. Below are some common methods to set up studio monitors for different scenarios.
How To Set Up Studio Monitors in Room?
To set up your studio monitors in a room, keep some key points under consideration.
- Keep your speakers away from corners and walls.
- Maintain the orientation of your studio monitors.
- Make sure that they have an equilateral triangle shape for your listening position.
- The height of the high-frequency driver should be the same as the height of your years.
- Set the mix position symmetrically.
How to Set Up Studio Monitors to Computer?
If you are worried about how to properly set up studio monitors, the process is never easier. Make sure that the knob of your monitor on the interface and the knobs of volume on the speakers will turn down when you connect your studio monitors to a computer. It will protect you in the case of accidental play of loud sound through speakers that can damage the speakers.
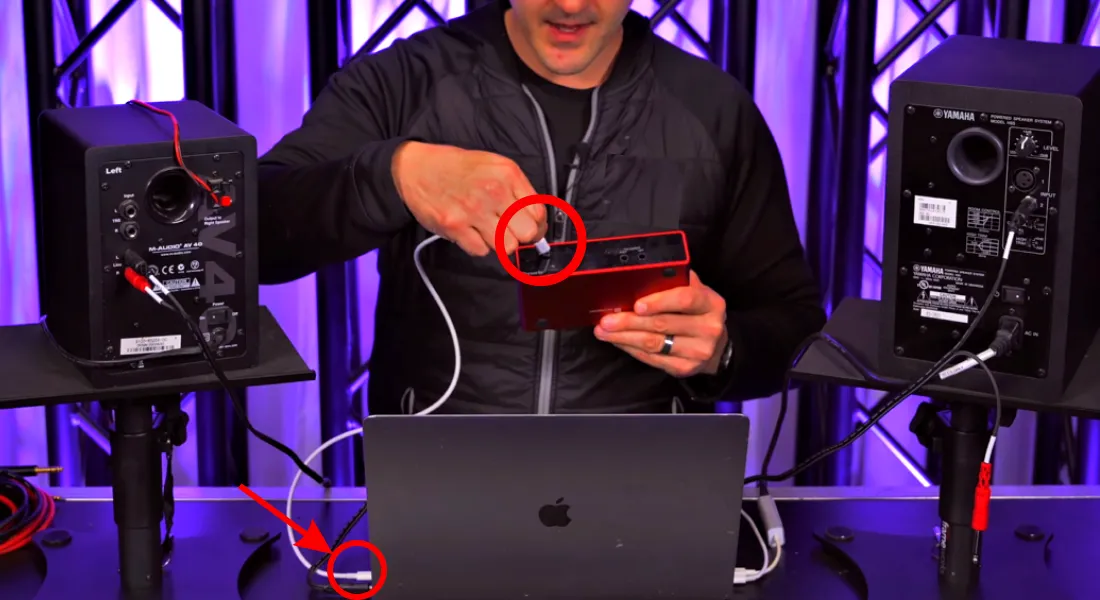
It is straightforward to set up the studio monitors to a computer by using a 3.5 mm to dual 1/4 inch and also with the XLR adapter but don’t use them and look for other options as well which are safer and better in results.
Instead of using this adapter or cables, use a USB audio interface which is the most reliable and provides high-quality outputs with a knob for controlling the volume. You can use Focusrite Scarlett 2i2 audio interface with the combination of JBL studio monitors. This interface has 1/4-inch outputs, and the monitors have 1/4-inch inputs. You can easily connect them by using a 1/4-inch TRS cable.
You may get options for 3 types of connectors on your monitors and interface that is 1/4 inch, RCA, and XLR. You can use adapters to connect the interface output with the speakers’ input. For this, you can consider 1/4 inch TRS cable, 1/4 inch TRS to XLR cable, and 1/4 inch TRS cable RCA to 1/4 inch cable.
How To Connect Studio Monitors To Computer Without Interface?
If you want to produce better sound, then the audio interface is necessary for more effective work. You can easily use it by connecting it with the right cables and studio monitors. However, if you don’t want to connect monitors without an interface, use the following simple steps.
- Getting Suitable Cable: Various cable options are available in many lengths, and you can use them for connections. The cables like 3.5mm jack to 2x XLR cable and many more of this type are ideal for professional video and audio applications. Moreover, you can also use them for your lighting gear on stage.
- Attaching the Studio Monitor: Connect these cables to your respective monitors and computers. But the kind of cable you want to use in connections may need a DJ set to your monitors.
- Check All the Adjustments: If the cable differs from your requirements, you can extend it with microphone cables. To complete the setup, you may require two cables, one for both speakers and the other for your studio monitors.
How to Set Up Studio Monitors With Audio Interface?
For the setup of studio monitors with the audio interface, you may follow the below steps:
- Select the Right Location: The first thing to pay attention to is picking the right location to place everything. You can also consider where your AI goes because you may need easy access. You can easily control the volume levels with easy access to AI.
- Install Proper Drivers: Pay attention to the computer drivers necessary for AI after setting the equipment. It will only work with compatible software if you don’t have to install them and remain updated. For this, you can visit the website of the audio interface manufacturers because they will provide the latest updates for your setup and model.
- Update Drivers: However, you can double-check, as AI cannot work without updating the drivers, and as a result, you may end up in a rabbit hole of replacing cables. You need to go to the “Update Drivers” in your settings.
- Connect Audio Interface: Then, connect the AI to a computer with the cable included in the box of AI. You can also use a mini-USB to USB cable.
- Turn Down Volume: Turn down the volume to zero on your AI. Make sure that all volume settings are on a zero level. If your monitor has the option, turn it to +/- 0db. You can turn the volume to its lowest level if your monitor lacks this setting.
- Plug and Start Monitor: To plug your AI into the studio monitors, you can use XLR, RCA, and TRX cables. Now plug in your studio monitors and start them.
- Turn the Volume Up: Then, turn the volume of monitors up to 50%.
- Turn a Bit: Now play music on your computer and slightly turn up the volume on AI. When you reach 25% and don’t hear any sound, then stop. Now bring the volume to zero and unplug the USB connection to AI. After disconnecting the AI, check out the audio output on your computer, or you can play it via built-in speakers or headphones.
If you still need to receive audio, get this working going further. Remember not to turn the volume up to 100% on your AI before pressing the mute, as it will blow your eardrums and monitors.
Using 2 Sets Of Studio Monitors At The Same Time is Good?
Using a set of 2 or more studio monitors simultaneously will give you an advantage as you can cover similar frequencies in the same space. But it may affect the sound negatively.
On the other hand, dual screen studio monitors’ setup gives freedom and makes your work easy by opening multiple windows simultaneously. However, if you want to use your monitor for multiple sets up, the buying criteria are different compared to the simple setup.
Two studio monitors will benefit your online training, video collaboration, and productivity. These are significant gains, but they may also have some drawbacks, like they are expensive, potentially distracting, and require additional resources.
What are Studio Monitor Settings?
Ensure your studio monitors are in the right place and adequately plugged into the power source. Also, keep all of the volume knobs of speakers sown and then turn them on whenever you connect it with the interface. The following settings will help you:
1) Gain Settings
First and most important is the gain settings; for this, play something out of the speakers through an interface. Then adjust the volume of your interface up to half or two to a third of the way. After this, adjust the speakers’ volume until it becomes soothing. When you do this, it will provide you the room to turn it up or down.
2) HF / LF Trim Settings
If your studio monitors have HF and LF trim settings, they can cut or boost the high and low frequencies. It is up to you to choose a setting that can match your requirements or taste. However, ensuring that both speakers’ settings are the same is vital.
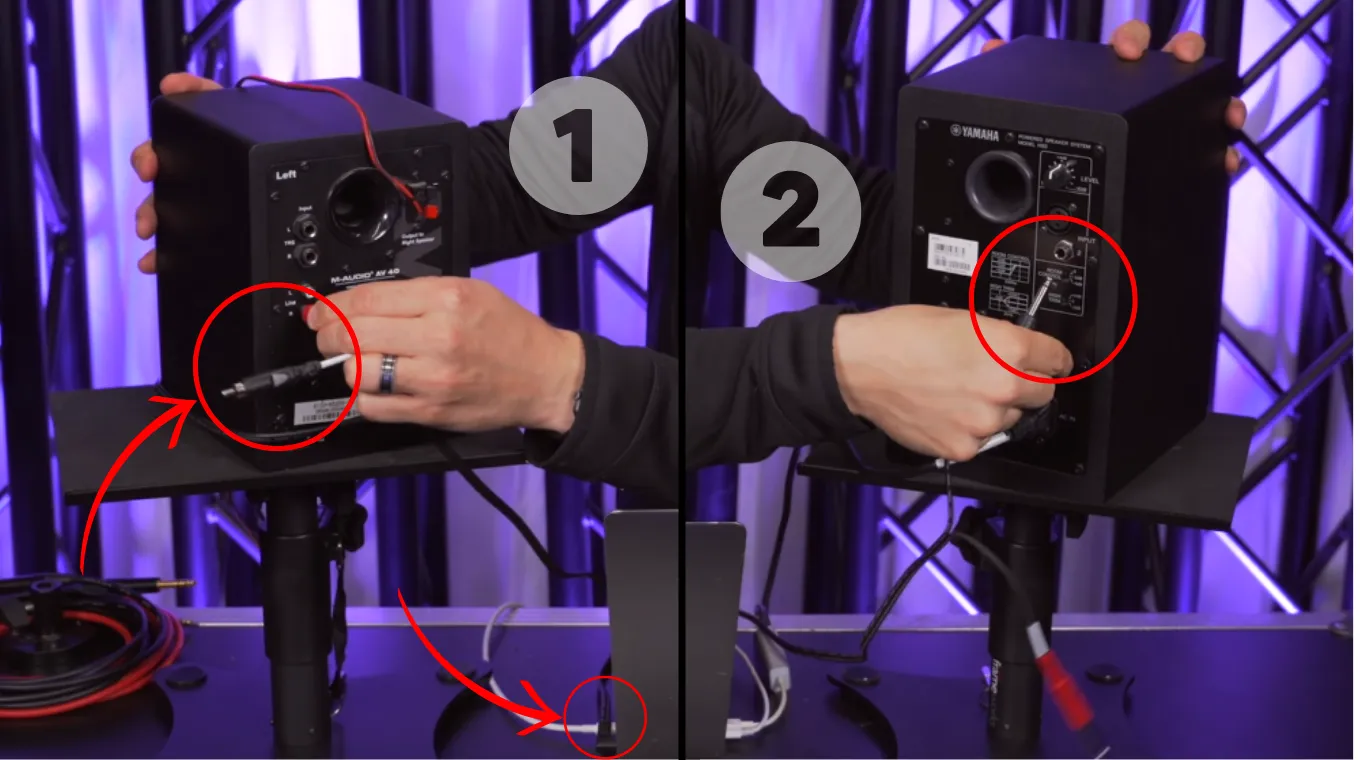
3) Input Sensitivity Settings
An input sensitivity switch on your studio monitors contains a line-level voltage of the interface in your use. It makes sure to provide great sensitivity to the volume levels.
Setting up the studio monitor is not as complicated as you may have thought. Follow the procedure given above to set up your monitors without having to get any technical assistance. You can set these monitors with and without an interface, making them versatile for any given setup. I hope you got the information that will help you with the procedure. If so, give your feedback in the comments.
Final Words