When you change the strings of your acoustic guitar, it becomes like a treat for you. After changing the old stings, your guitar can produce a new definition for your hearing and become more pleasant to play. But the critical question is at which point you should change these strings, and if you do it the first time, then from where you can start and what kind of tools you need.
Don’t worry! I am here to tell you how to restring an acoustic guitar step-by-step so that you can quickly restring your guitar. In this article, I will explain the best way to restring guitar at home. The best thing about that change the strings of your acoustic guitar will become second nature for you when you give it time, patience, and practice.
How to Restring An Acoustic Guitar For Beginners?
If you are a beginner, then there is no need to worry because changing the acoustic guitar strings is not much challenging. You can learn it with a bit of practice and patience. The following methods can help you efficiently restring guitar classical way with or without tools.
How to Restring An Acoustic Guitar With Bridge Pins? (8 Easy Steps)
Here is an example to show how easy to change the old strings with bridge pins. After learning and practicing, follow these steps, and you won’t need a guitar stringing diagram anymore.
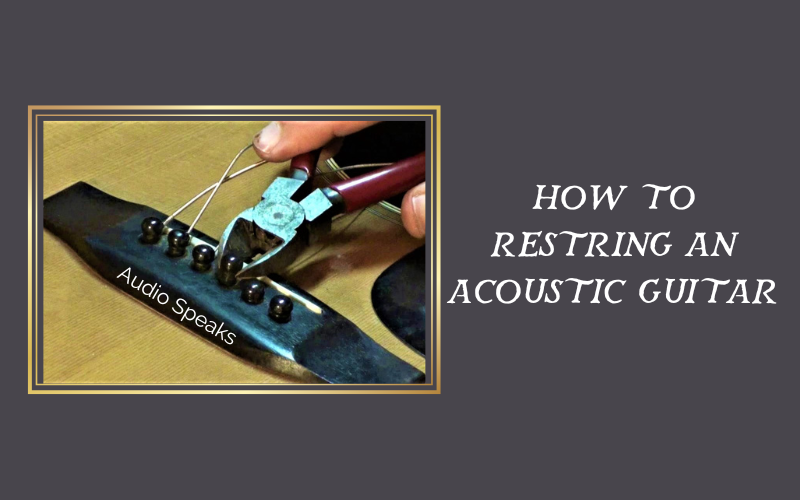
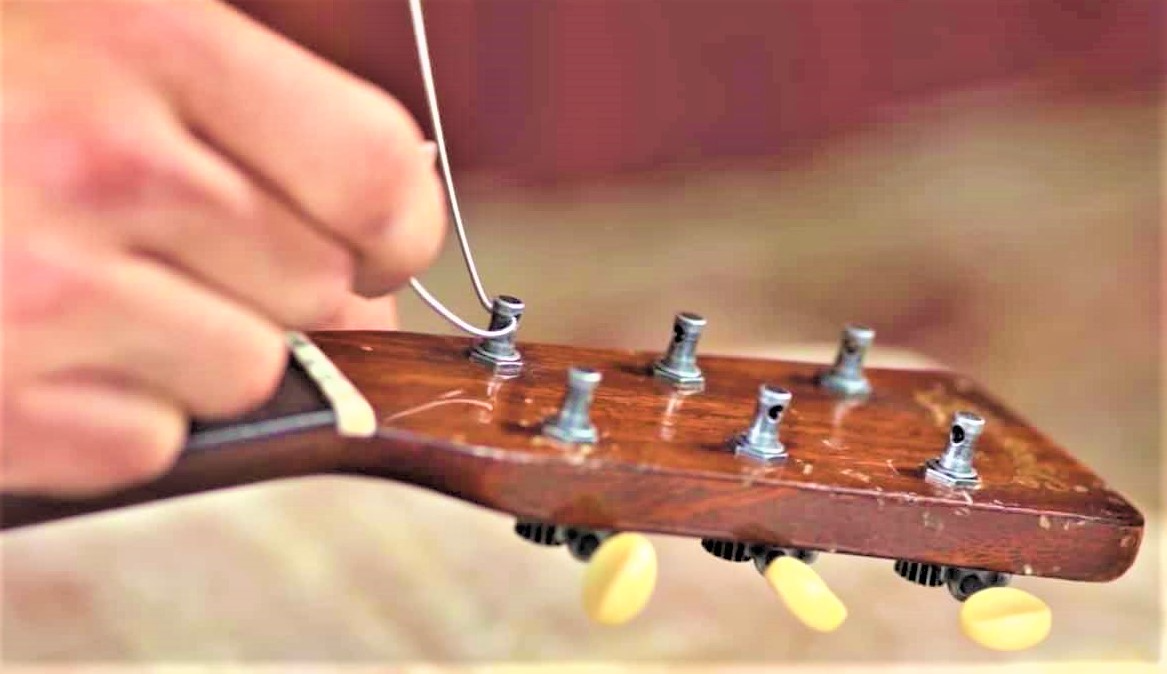
1) Loosen and Remove Old Strings
First, there is a need to loosen the old strings by using the machine heads. You can use a manual string winder or a motor for convenience because they help speed up the whole process. Once old strings become loose, you can cut them using a cutter, and remember not to use scissors as they can blunt these strings.
2) Remove Pins

Several string winders are readily available in the market with the feature of a tool for string pin removal. You only need to pull each pin out so that the string balls end on the bridge will easily release. It is essential to watch out for each groove in every string pin. The placement of each string in the right place is necessary when you install the new strings. Remember to point these grooves towards the neck of the guitar for perfect fitting.
3) Clear off the String Remains
At this point, remove the pieces of strings wrapped around the heads of the machine. For this purpose, use pliers. However, these pliers are brutal and sharp, so be careful while using them and watch your hands to avoid accidents.
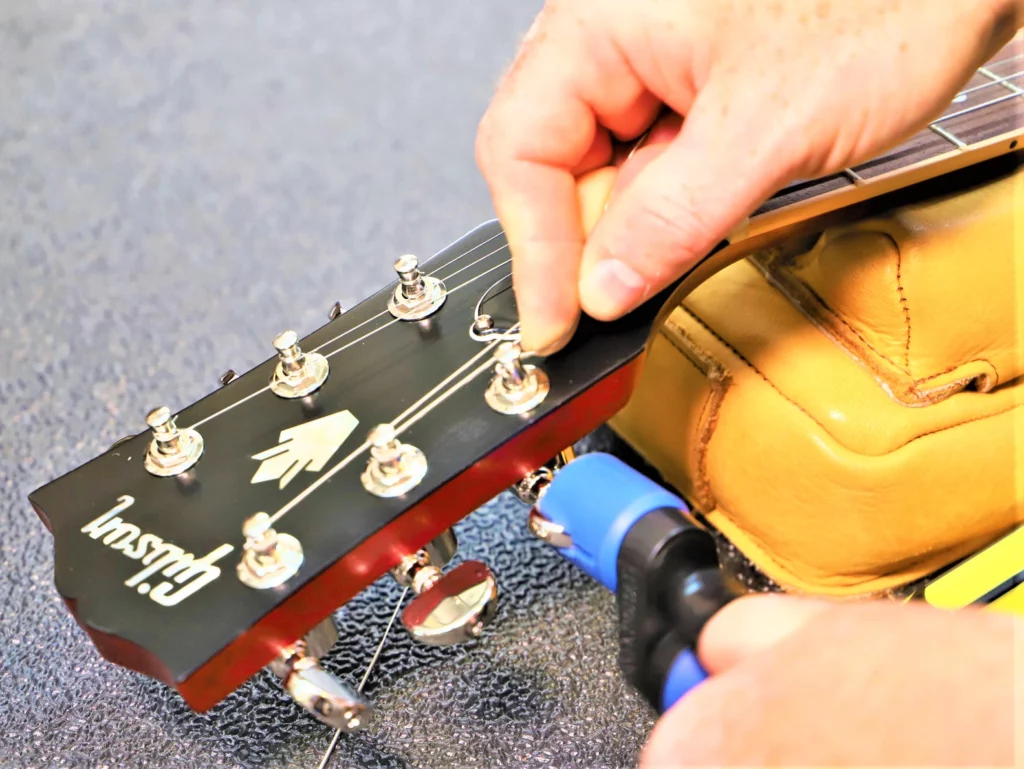
4) Begin with Installation
Removing old strings is also good for cleaning all parts of the guitar, including its neck, body, and fretboard, with a lint-free cloth. When done with the preparation, it’s time to fit your new string. The first step is to thread the ball end of the first string through the hole in the bridge of your guitar. After this, push the string pin in the groove towards the neck.
5) Slightly Slacken the Strings
Now fix the string to the hole matching its machine head. While fitting them, keep in mind that there is a slight slack in every line before tightening. It’s essential for enough excess string to wrap around the tuner. Hold the string at the machine head and do a ‘karate chop’ on the neck for the fitting. Place your hand upright at the halfway of the neck, then run the string over the top of your hand.
6) Secure and Position the Strings
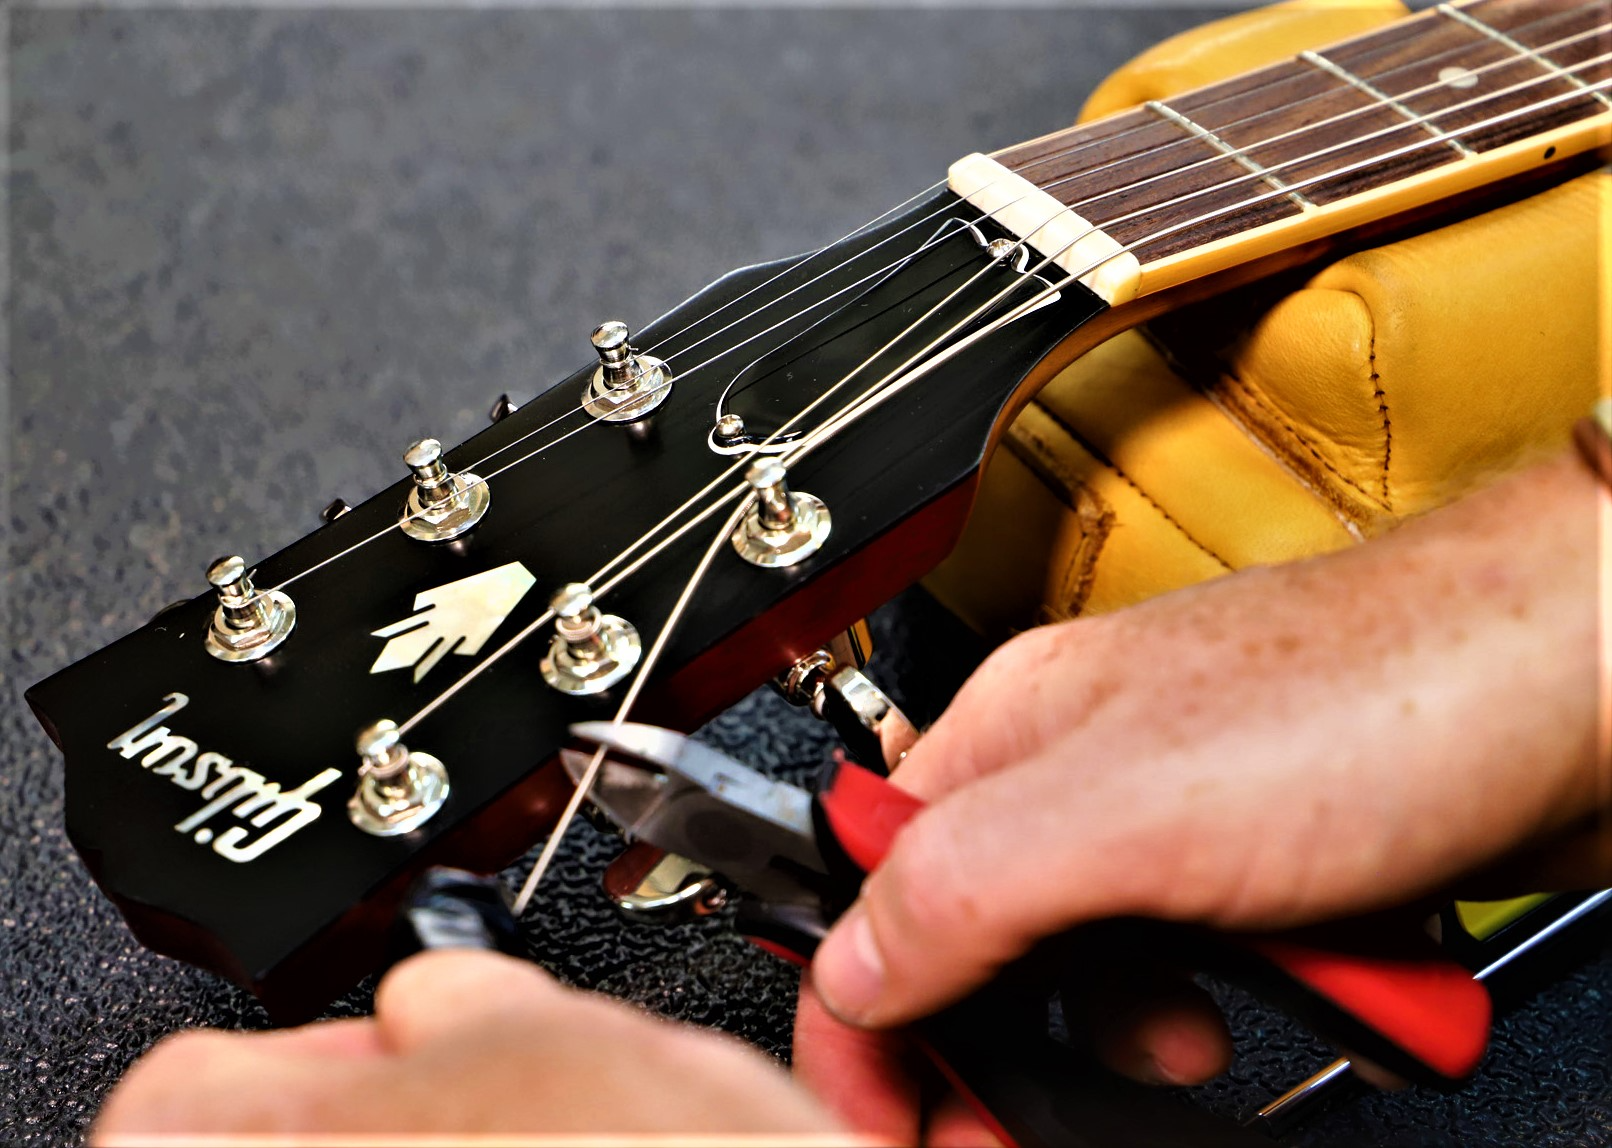
At this point, these strings are ready for tightening. For this purpose, feed the string’s tail around the tuner and fold it under the string. Now pull its tail upward and tight it in this way. A kink will produce in the string, and it will help you to hold it in place.

7) Start Winding
The bend in the string at the end of the machine head will secure it under a bit of tension. Now pull its main body and let the machine head start winding. Make sure that the tail of the string will remain underneath the central part of the string.
Wound these strings around each machine head. The top three and fastest strings of any acoustic guitar need to turn in an anti-clockwise direction, and the bottom three and thinner strings will fix in a clockwise direction.
8) Tune-up and Discard Excess String
At this stage, when you install all six strings, start to tune them properly with a guitar tuner. While turning up your tuners to give a pitch to each string, place your thumb over the string pins so that they will not slip before full tension is reached. When this procedure is complete with accuracy, trim the extra string at each machine head with a quality cutter.
How to Restring An Acoustic Guitar Without Bridge Pins? (5 Steps)
If you don’t have bridge pins, don’t worry; you can change strings without them. The following steps will help you with how to replace strings on an acoustic guitar without bridge pins.
1) Purchase the Strings
Several string choices are available to pick, like classical nylon guitars and steel strings. It is up to you to pick from these different string types that will suit your acoustic guitar and also depend on your playing style. There are many options for you to buy, such as titanium strings, composite strings, rectified nylon strings, and many more.
2) Discard Old Strings
Removing all strings is not essential if there is only one that creates a problem. You can change one string at a time. But it is good to change them for better consistent wear and tone. If you face any exceptions like the broken string soon after changing them, you can replace it only with a new one.
3) Attach String to Bridge
I think the only tricky part of attaching strings to your is tying them with a bridge, for the following steps will be helpful for you.
- Through the hole in the bridge, feed the upper end of the string so you can put the correct string in the appropriate place
- Pull all the string but leave behind almost 3 inches so that you have something to work on while tying them
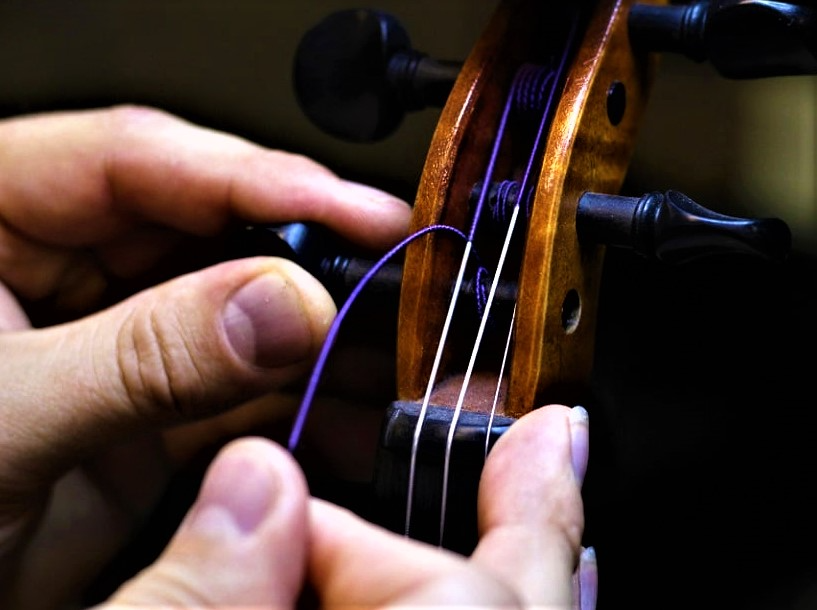
4) Attach the String to the Headstock End
Once you attach the string to the bridge, you can string it to the tuning peg. Tighten the one string and then repeat the same process for another one.
5) Tune Strings to the Proper Notes
You must tune the string to proper tension when you complete the guitar restringing. Change it according to your taste and how you like music.
How to Restring An Acoustic Guitar Without Tools?
Sometimes investing in the tool may seem expensive, or you get into a situation where you don’t have access to the tools. It is where this method can come in handy. Read it carefully to learn how to properly string an acoustic guitar without tools.
1) Find the Proper Area for the Job
There are a few things to do while restringing your guitar. First, find a clean and tidy area where you can change guitar strings. It is good if the place is quiet so you can do your work with care.
2) Remove the Old Strings
You should remove the old strings before placing the new ones. For this purpose first thing to do is to lose these strings by losing the tension using the tuning keys. Initially, you may need to understand how they lose up and get tight.
3) Remove the Bridge Pins
Many people use string winders for this purpose. However, you can do it with your fingers if you have a tight budget. You only need to find something small and sturdy to grip the bridge pin so you can easily pull them out. Removing the strings from the bridge becomes easy if you successfully pull them out. I advise you to clean the fretboard with a cloth while replacing its strings. Remove all dust from the fretboard.
4) Add the New Strings
After this cleaning process, your fretboard will look fresh, and it’s time to add new strings. I recommend you put the new strings in descending order from thickest to thinnest. When you put the string into the bridge hole, put these bridge pins you removed earlier. These pins contain a small hole at the front that allows them to house the string, so it is vital to line it correctly.
5) Fixing the Strings to the Tuning Pegs
When all the strings pin to their respective hole, it’s time to fix them up to the tuning peg. However, there is no specific tuning head for each string. The only simple way is to place them in a tuning peg in a way that they will fix according to your playing tune.
Pass through each string using one tuning peg from inside to outside; start with the thickest string and pull it to its right extant, which means tight. When it becomes tight enough, wrap the leaving string around the tuning peg ad place it under the string.
Now turn the tuning peg anti-clockwise so the remaining string will wrap around it slightly. Here you will get two options. One is to cut down the remaining string nicely with a cutter. The second option is to put the excessive string like a bun in the peg.
6) Tuning Your Guitar
In my view, tuning is a vital part of this whole process. However, it may become difficult to tune your guitar without a tuner saving it from any scratch. Here you may need experience, and you may also get the help of an experienced fellow to do this process carefully.
Resting your acoustic guitar is not difficult. Even any guitarist can do this in a good way. However, you may need some tools to save your guitar from scratch. Otherwise, the process is easy if you follow the steps and take your time.
While pushing down the bridge pin, make sure that its tail will sit in the groove of the hook, and it should point straight down the neck. Follow these steps for the other five pins. Now ensure that the tail of each string and ball end should touch the bottom of the pin. The only thing to remember is that each machine head’s holes remain straight down the neck. And the rest of the procedure is the same for acoustic guitars.
Guitars for right hands may wound the left-handed because the guitar shape is symmetrical. You may need to pay attention to the nut and saddle. In various cases, replacement may require to ensure reliable inflection and playability.